Configuring Primev
This guide outlines the necessary steps required to configure MEV-commit within your SSV node to enable operators to participate in MEV and preconfirmations. You can learn more about the concept and technical details on Primev documentation.
You should only participate if you're managing all operators in the cluster. If you will participate without one or many operators in the cluster — your MEV-commit collateral will be slashed. As an individual operator, you can always choose to use regular MEV Boost.
Overview
To give you a short summary of the steps you'll need to take:
- Install MEV Boost client
- Choose preconf-compatible relays
- Enable MEV in Beacon Client
- Register your validator(s) with Primev
Install MEV Boost client
The process is best described by the mev-boost team on their GitHub page.
Choose compatible relays
MEV-commit friendly relays are mentioned on the Primev documentation, you will find relays' URLs there too.
Enable MEV in Beacon Client
Your mev-boost endpoint should be used by Beacon Client in the Builder endpoint variable. Make sure the endpoint and its port are accessible by your Beacon Client.
Follow the setup guidelines for configuring MEV on your preferred client:
Enable MEV in SSV node
Builder proposals are managed by Beacon Client. So once you've done the previous step, your SSV node will collaborate with MEV searchers.
Register your validator with Primev
Without completion of this step you will be practically using MEV Boost without any additional rewards.
The registry accepts validator's public key as the validator opt-in identifier. Any account can stake on behalf of validator pubkey(s), and only that account has the ability to unstake in the future.
The VanillaRegistry.minStake parameter represents how much ETH must be staked per validator pubkey to define that validator as opted-in to mev-commit. On Mainnet, minStake is 1 ETH, while on Hoodi it’s 0.0001 ETH.
- To learn more about this process, feel free to check out Primev's explanation here.
- To start the registration process, you can use the Mainnet validator dashboard.
You will need to submit your validators' pubkeys in a
.txtfile, each key on new line or separated by,.
Showcase Supported Relays
It's crucial for the network to display the relays supported by operators. The availability of this information aids the network's stability by enabling stakers to use it when considering how to form their clusters, thereby preventing the problems highlighted earlier. Additionally, this practice enhances the operator's likelihood of being selected by stakers.
How to show supported relays in operator metadata
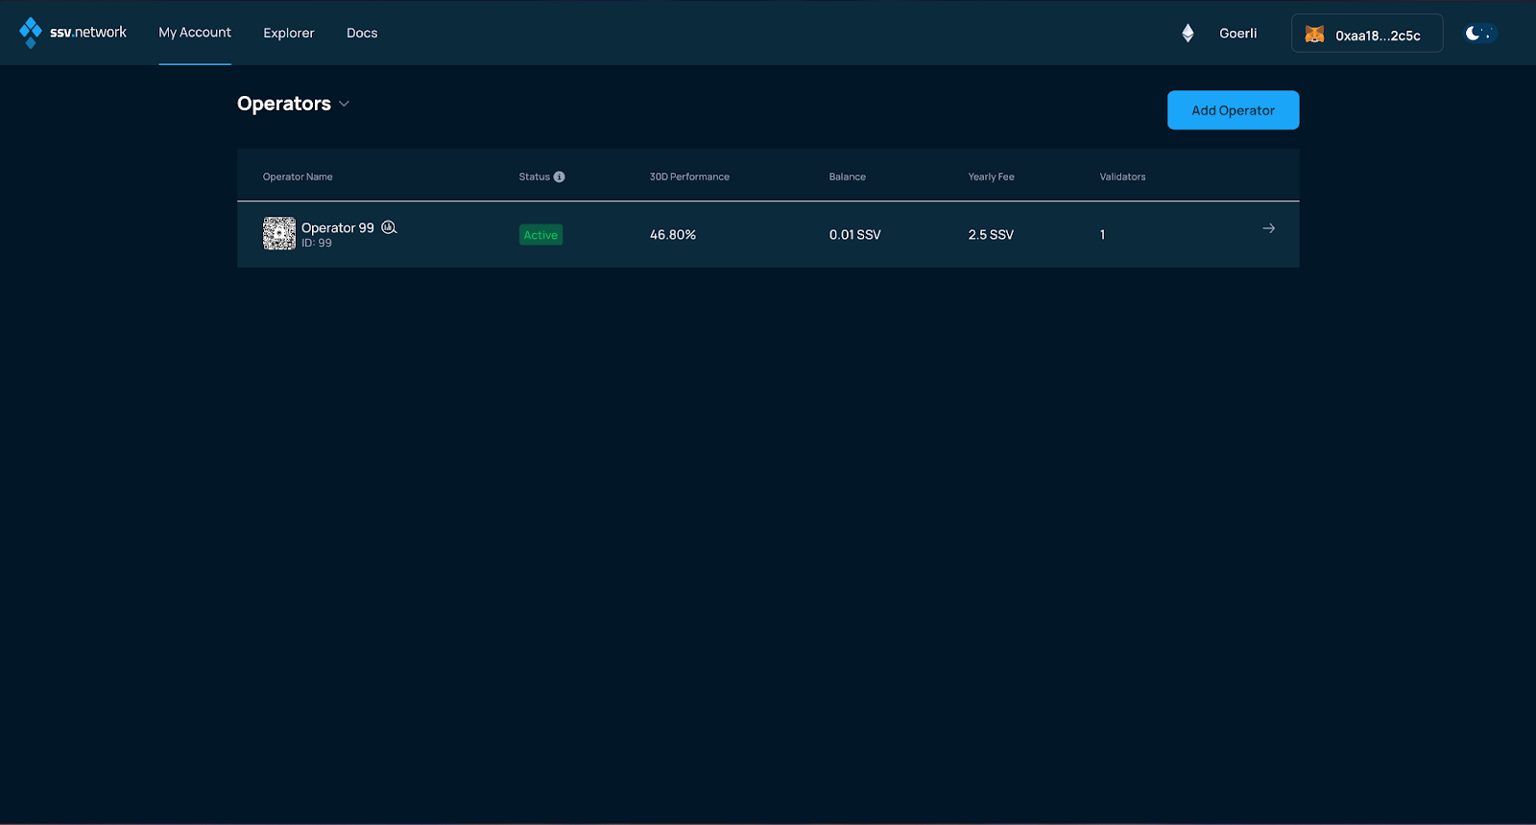
- Head over to the Operators Dashboard in the SSV webapp:
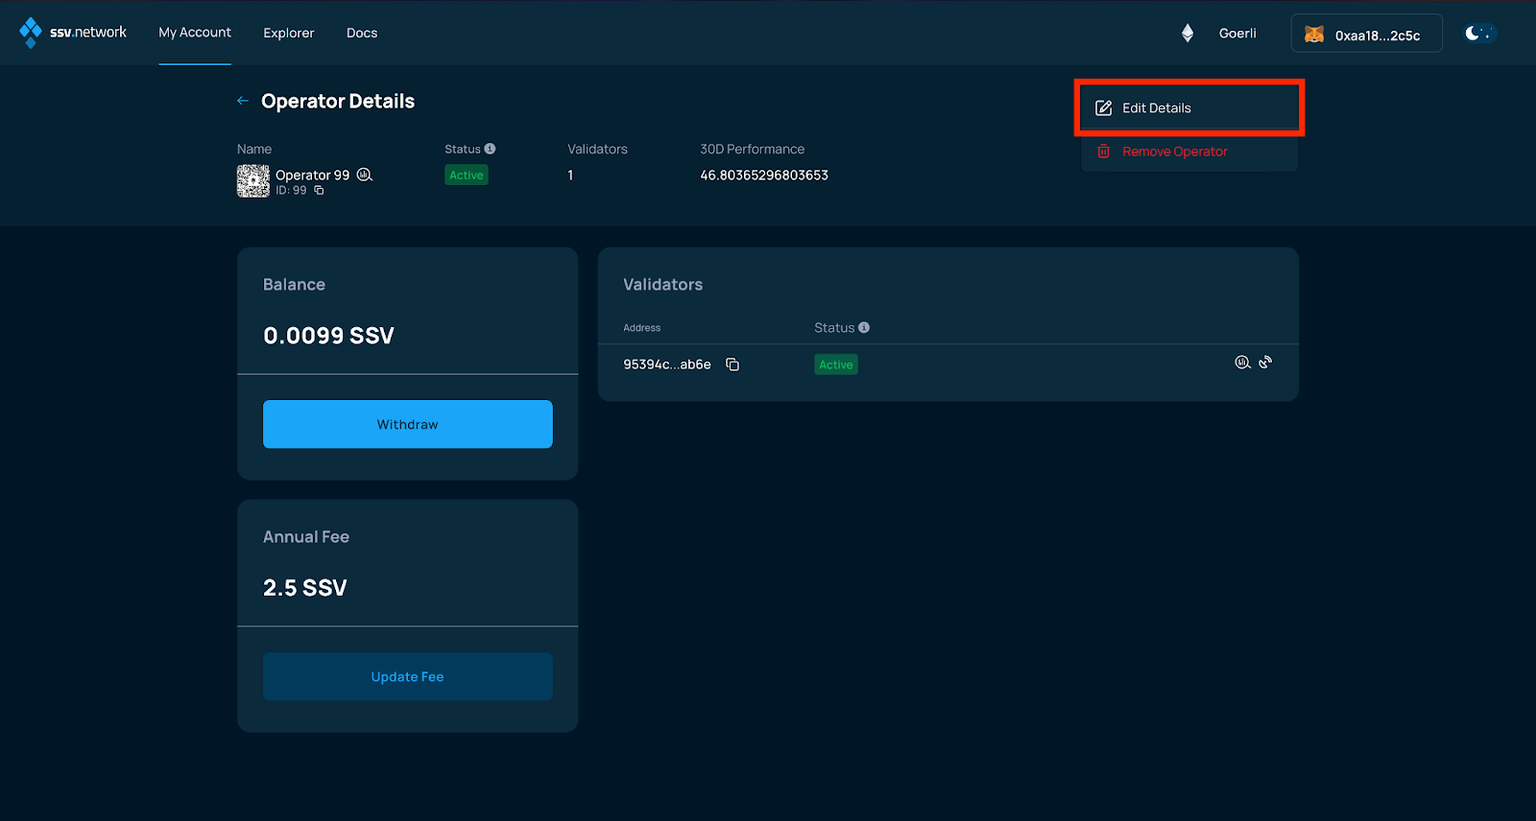
- Navigate to the operator page and click the Edit Details:
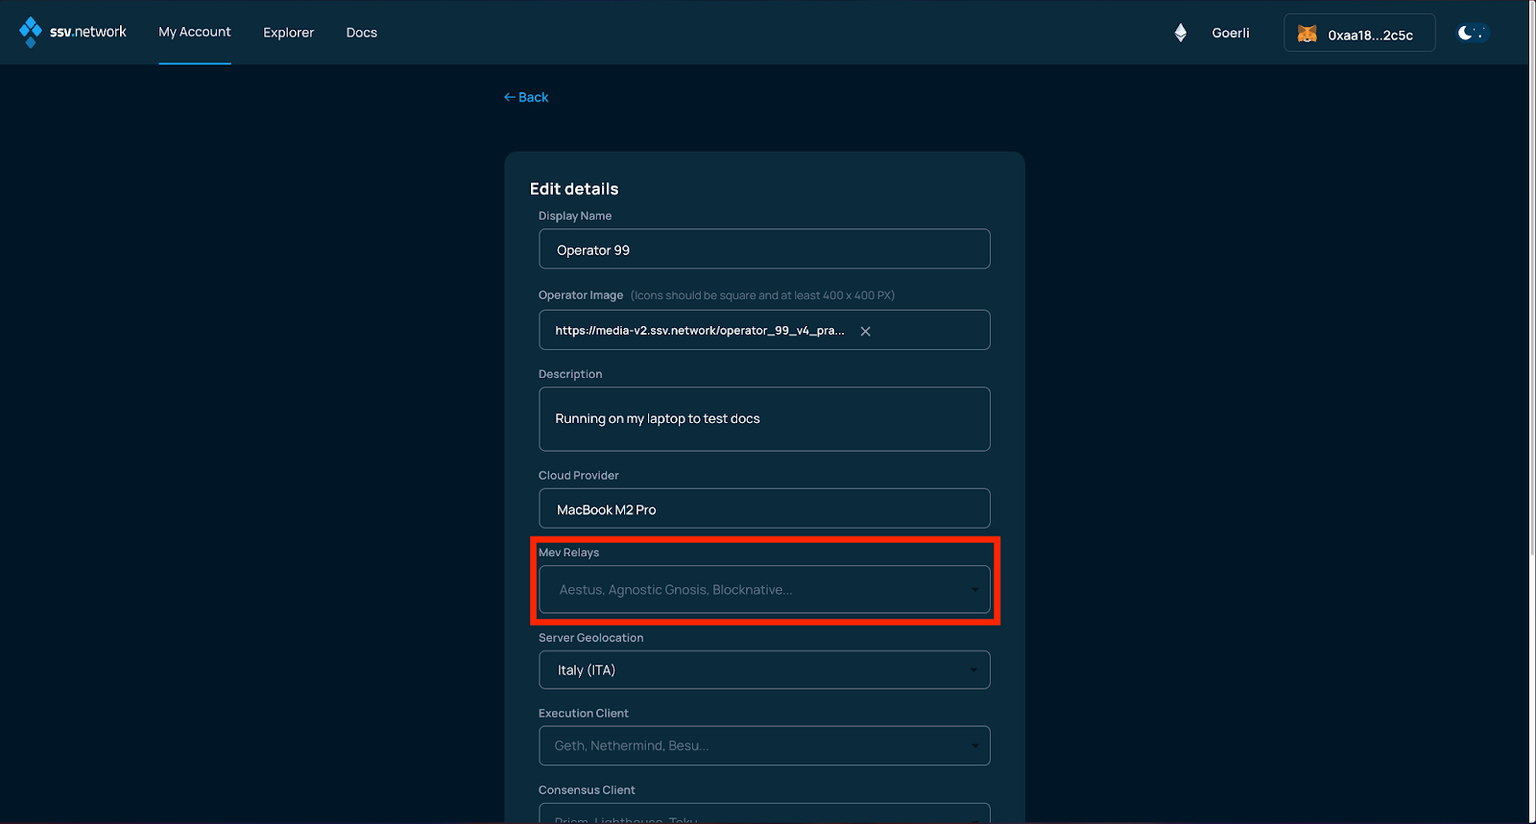
- Choose from the "MEV relays" list and click Update when done.
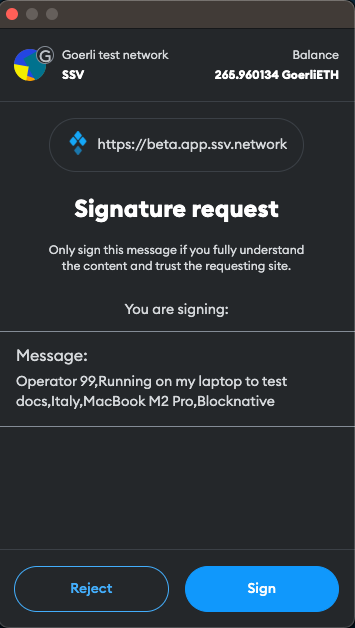
- Sign the signature request from the Web3 wallet used to sign-in (Metamask, in this case). This is needed to confirm ownership, it is not an actual on-chain transaction (no gas fees required).
- Success! The new operator metadata should be set and will be visible to everyone in the network.