Exit Validators
If you remove a validator first, you can no longer trigger the exit through SSV Network. In that case, you must exit it through Ethereum Launchpad Actions or by running another validator setup that can sign the exit message.
1. Connect your wallet
Connect the Web3 wallet that owns the cluster in the Web App.
2. Open the cluster
On the My Account page, select the active cluster.

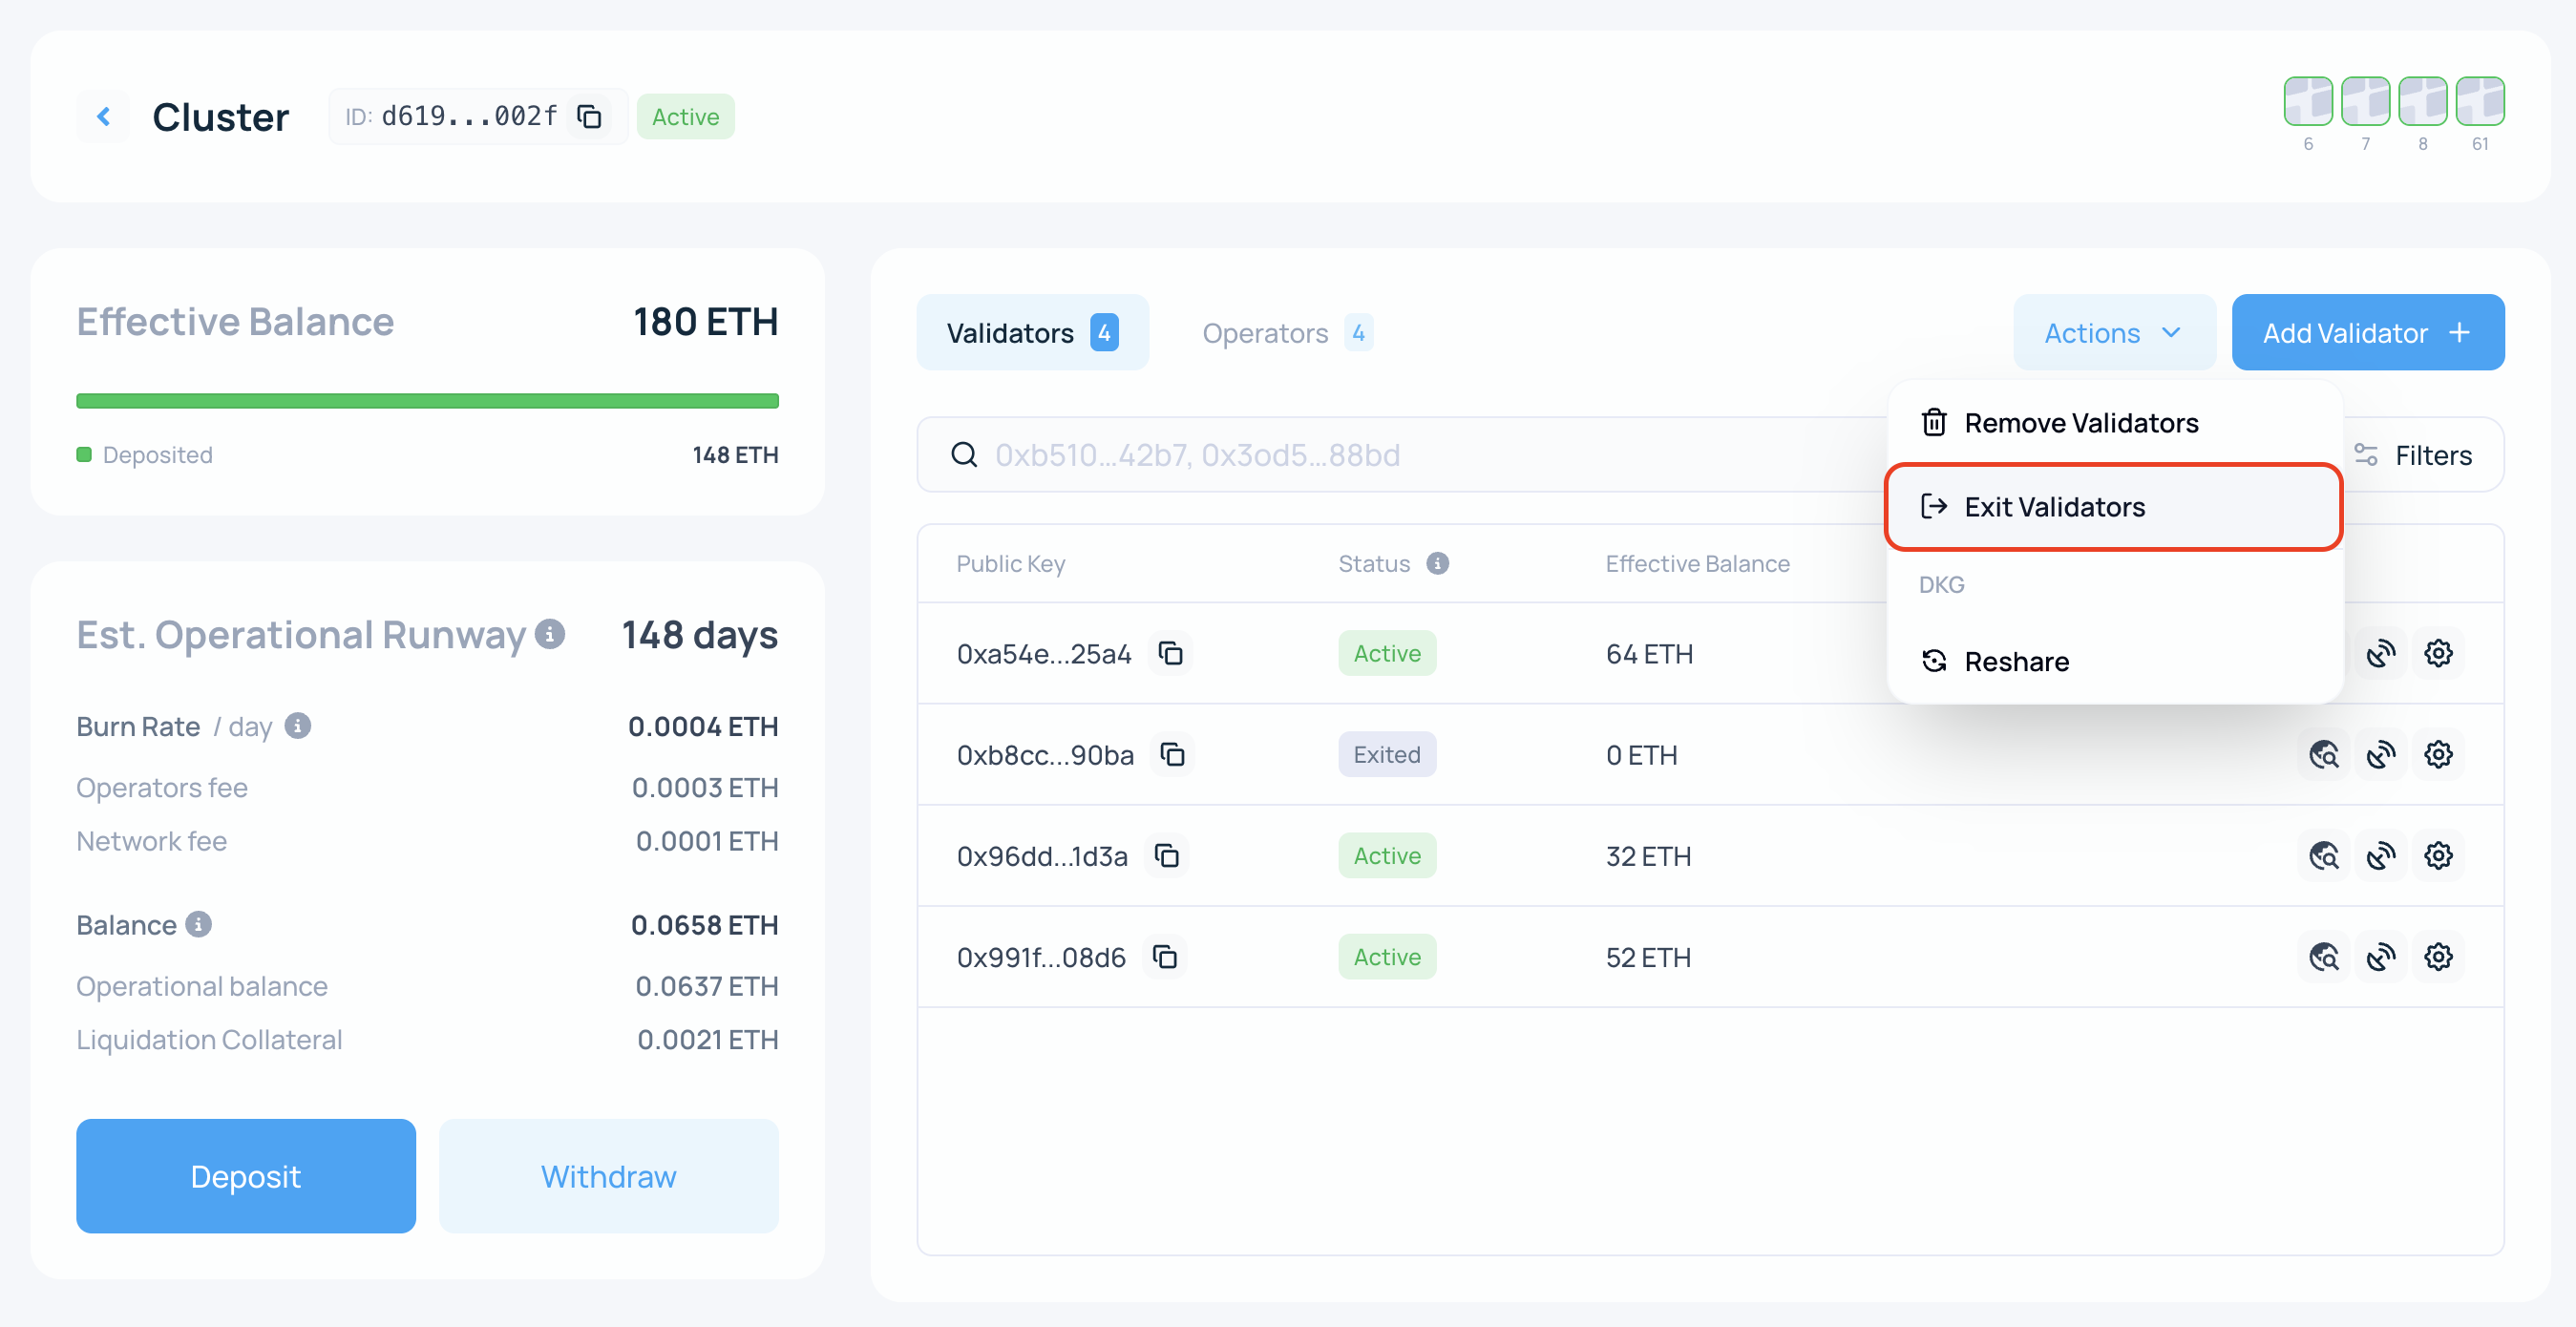
3. Start the exit flow
On the cluster page, click Actions and select Exit validators.
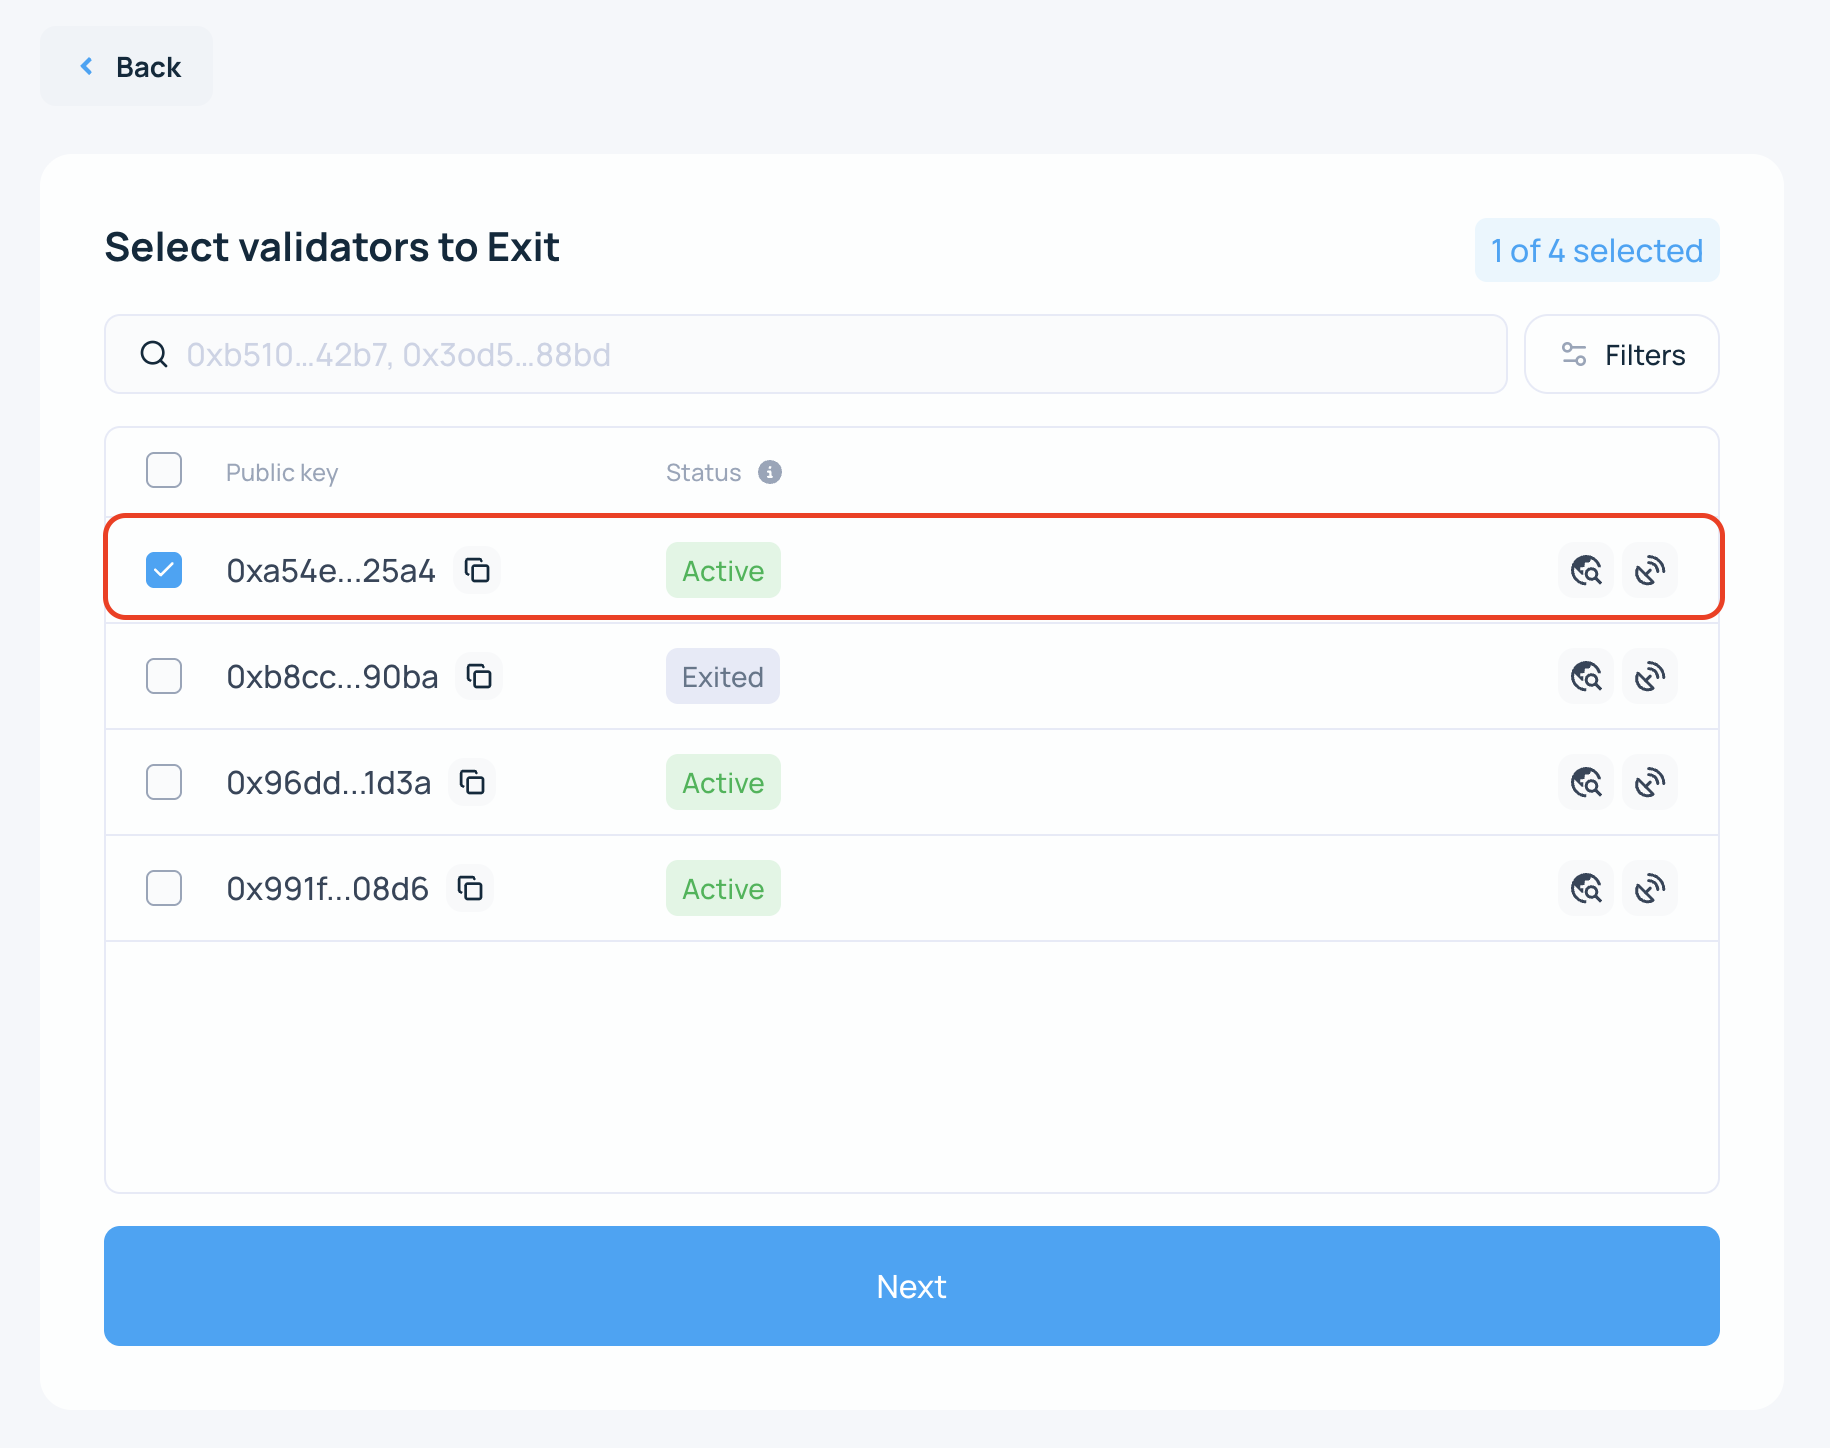
4. Select the validators
Select the validators you want to exit by public key, then click Next.
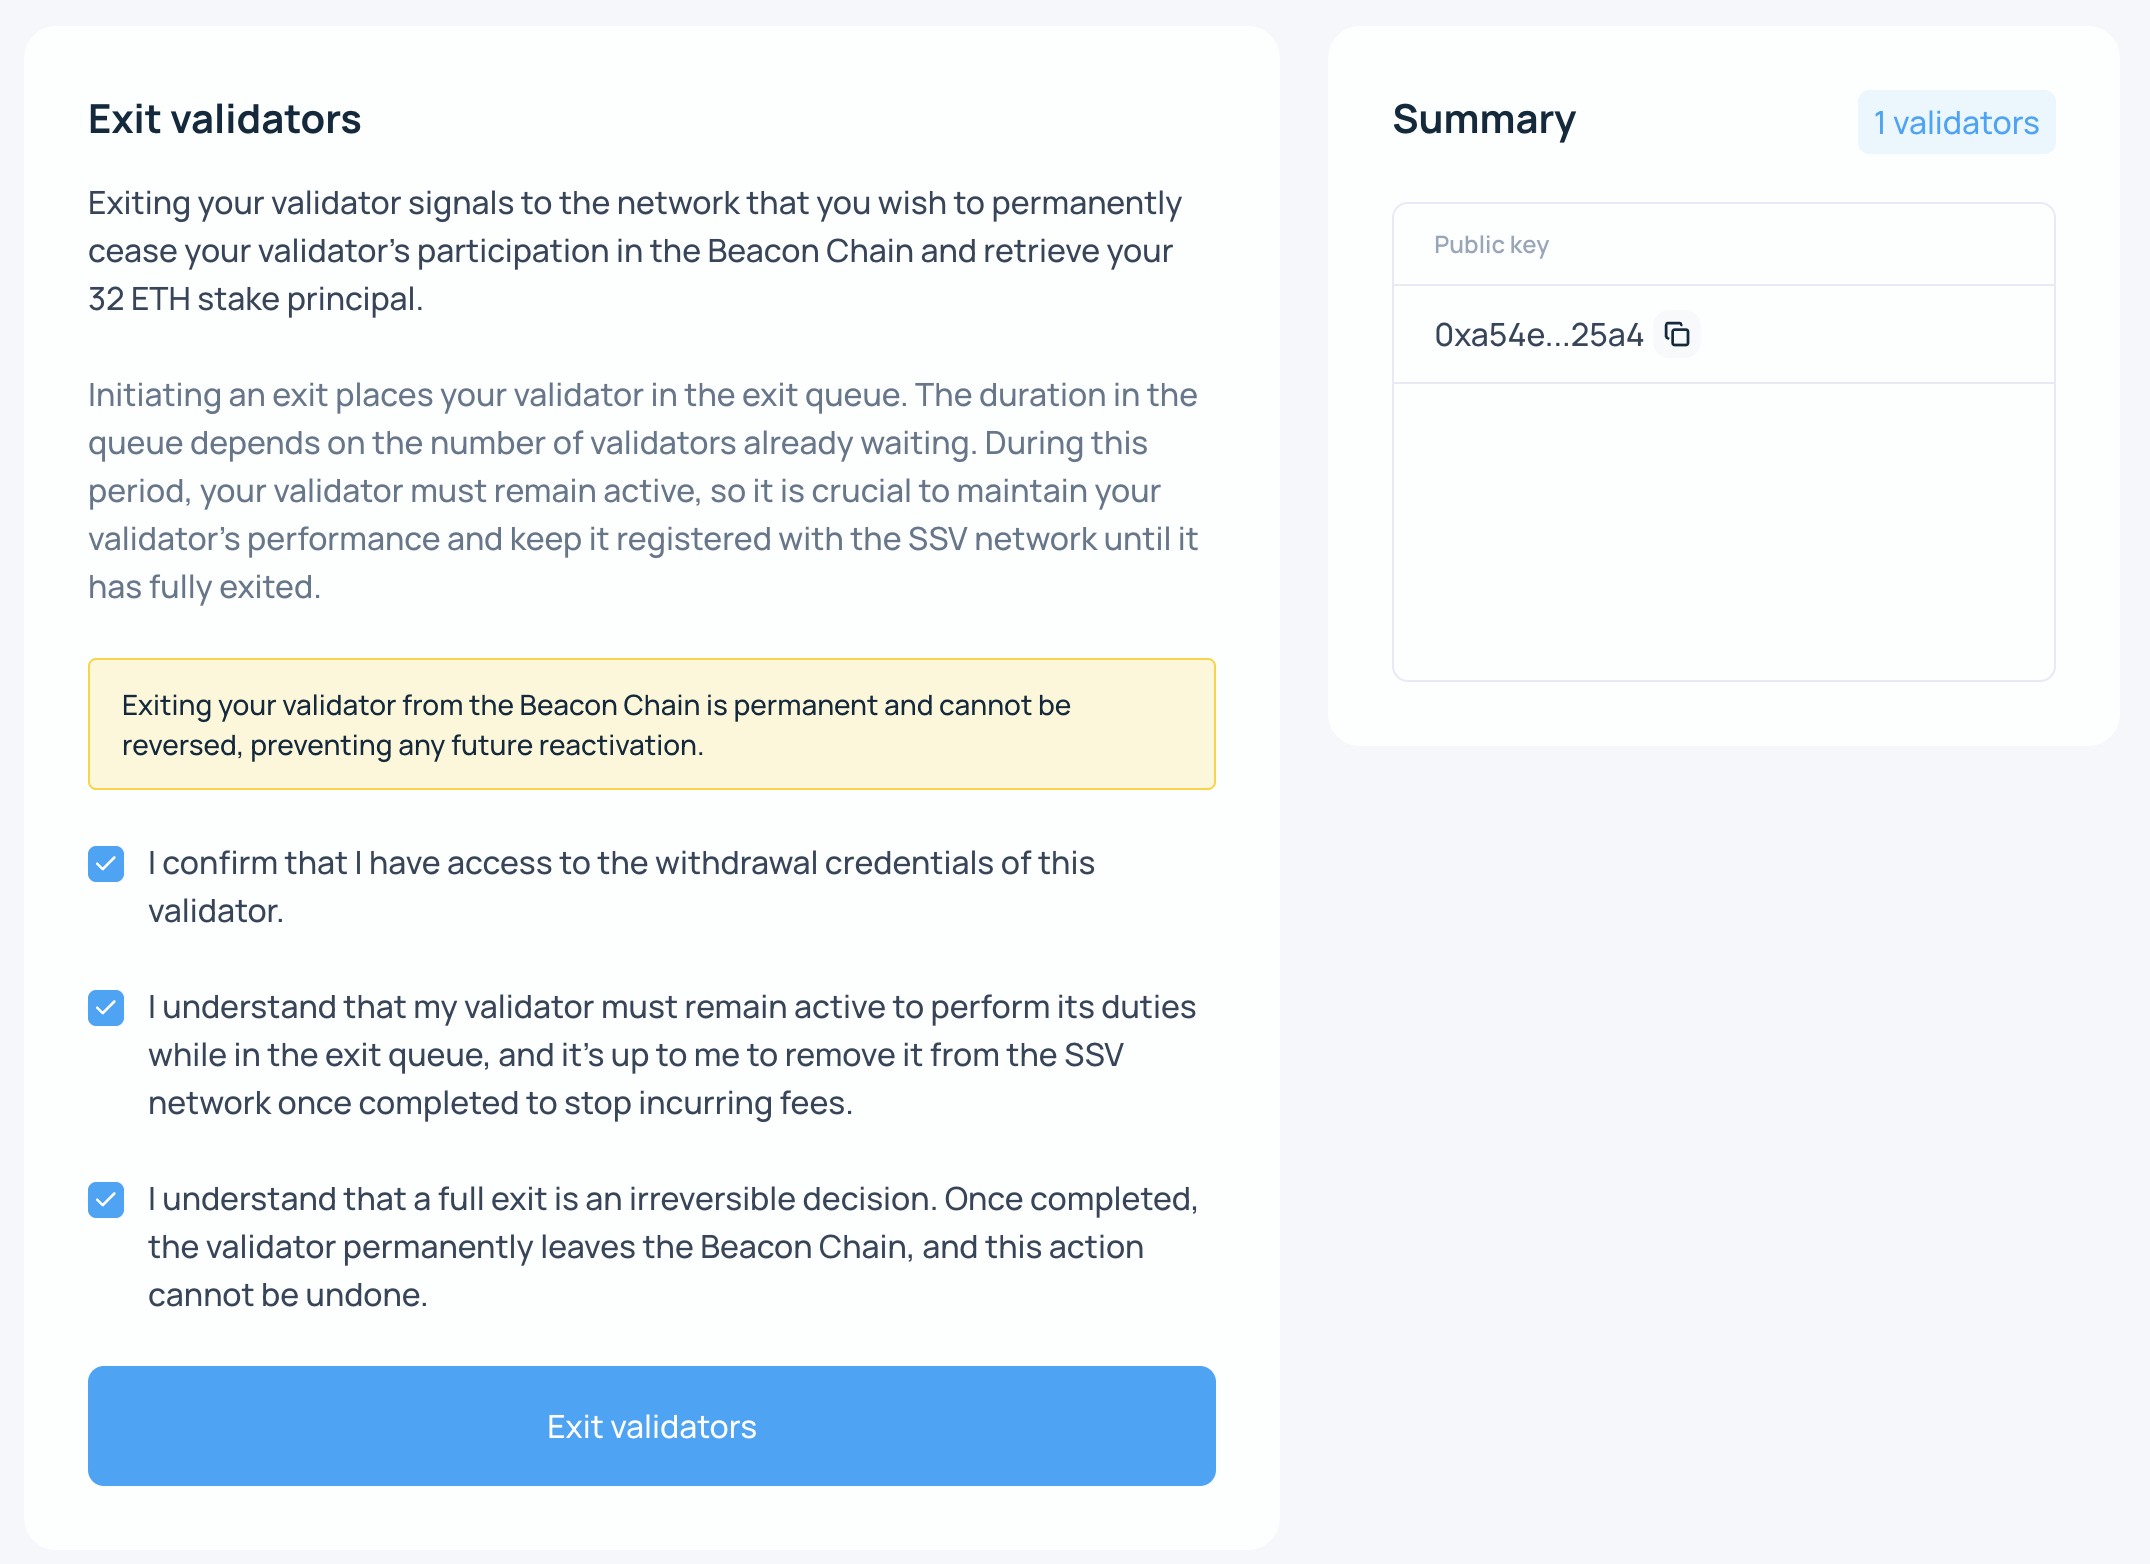
5. Review the warning and summary
Exiting a validator tells Ethereum that you want to stop validating permanently and withdraw the staked principal once withdrawals are available.
After you submit the exit, the validator enters the Ethereum exit queue. Queue time depends on network conditions and may range from hours to days. Until the exit is fully processed, keep the validator active and keep the cluster funded so the validator can continue performing normally.
This action sends a transaction to the SSV Network smart contract. The selected operators then coordinate to sign and submit the voluntary exit on behalf of the validator owner.
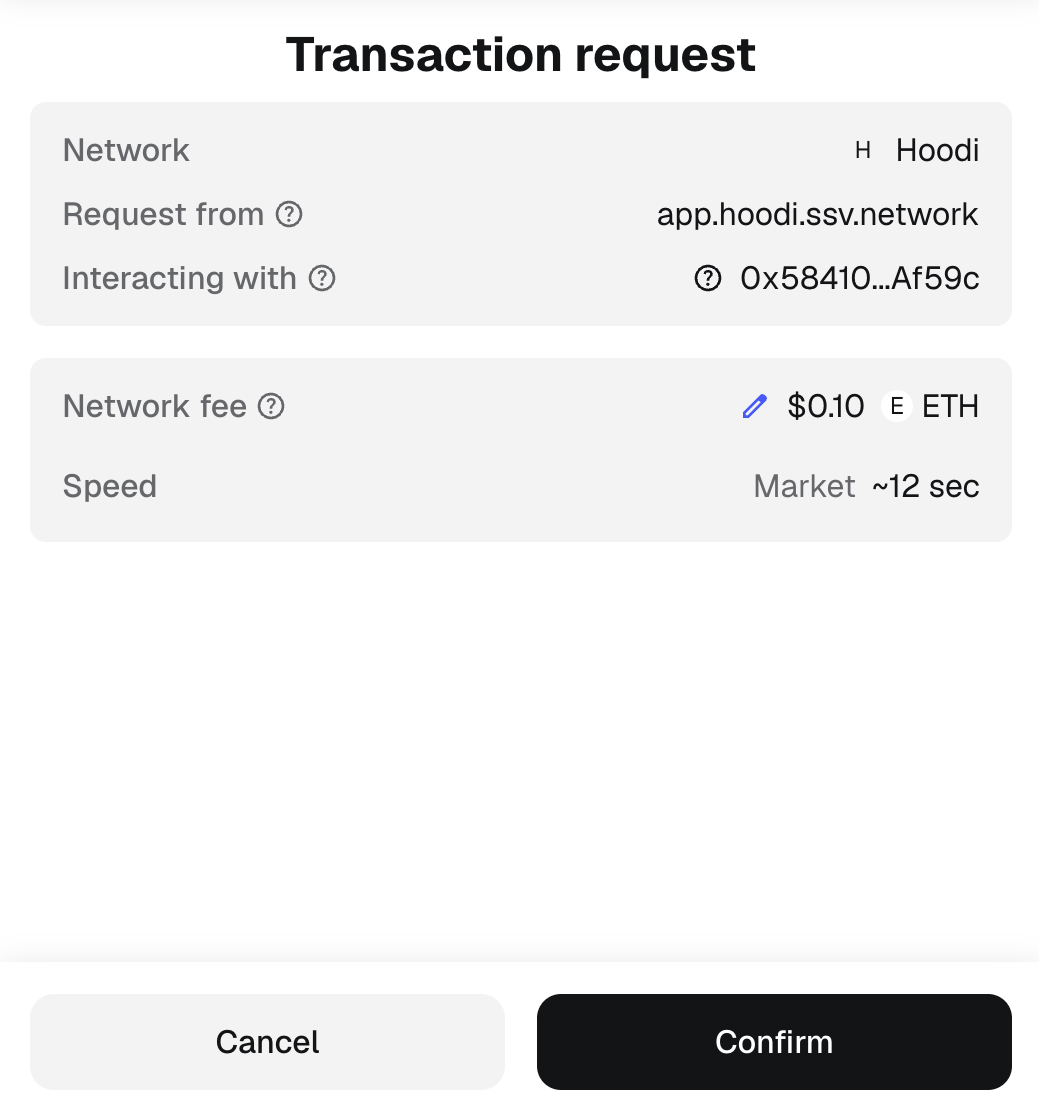
6. Sign the transaction
Sign the transaction to confirm the exit request.
7. Wait for the exit to complete
After the transaction is confirmed, the validator is scheduled for exit on Ethereum.
Once the validator has fully exited, it will stop receiving duties. At that point, you can safely continue to Remove Validators without causing avoidable penalties.
The 32 ETH stake becomes withdrawable after the validator completes the exit and withdrawal process on Ethereum.